 In October, 1996, I started experimenting with pressure sensitive resistors.
The particular devices used were Force Sensing Resistors (FSR) manufactured by
Interlink Electronics.
The devices were part of a 'design kit' that was purchased
back in the late 1980's.
In October, 1996, I started experimenting with pressure sensitive resistors.
The particular devices used were Force Sensing Resistors (FSR) manufactured by
Interlink Electronics.
The devices were part of a 'design kit' that was purchased
back in the late 1980's.
Notes on adding Aftertouch (Pressure Sensing) to a Wind Synth
The following is a chronology of Art Whitfield's development of an Aftertouch for a wind synth. The primary purpose is to add another continuous controller (cc) to the wind synth to permit added user control.
Background and History:
In October, 1996, I started experimenting with pressure sensitive resistors.
The particular devices used were Force Sensing Resistors (FSR) manufactured by
Interlink Electronics.
The devices were part of a 'design kit' that was purchased
back in the late 1980's.
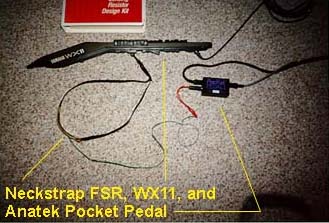
The Anatek Pocket Pedal is a Midi powered device (2"x2"x4")which reads resistance from a footpedal (typically) -the FSR in my case, and generates a proportional midi CC data stream and merges that into another midi data stream. Since the Anatek Pocket Pedal is self calibrating, all that must be done on power up is to run the resistance device through it's full range, and then select via dip switch what midi CC values to generate and merge into the existing data stream. This activity is similar to the work I did with the wind synth Tilt Sensor, which used a rotary potentioneter, weighted arm, and the same Anatek Pocket Pedal.
Experiment #1: (10/30/96)
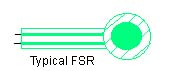
FSR Characterization -
Bench measurements of a 0.2" FSR indicated a resistance range of 1M ohm @ 0 pressure to 5K ohms at maximum comfortable finger pressure.
FSR Hook-up to Anatek Pocket Pedal
I took the FSR and wired it to the pedal input of the Anatek Pocket Pedal. On power-up of the Pocket Pedal, I pressed on the FSR to allow the Pocket Pedal to calibrate to the resistance range (1M - 5K ohms). On subsequent testing of the CC output from the Pocket pedal, there was no reasonable control of CC via finger pressure. This is suspected to be the result of the >1Meg resistance that the FSR shows to the Pocket pedal at the first part of power-up calibration.
The next experiment is to place a parallel resistor across the FSR so the Pocket Pedal always sees an impedance in the 100K range or so. Previous experience with the auto-calibration of the pocket pedal indicates that it's got firm limits, and the smallest resistance range that it wants to see is >4K ohms. This experiment here indicates that a resistance in the 1Meg range is at the top limit. The parallel resistor should determine if this is indeed the case. Knowing more technical details about the Pocket Pedal would also be helpful.
Experiment #2: (11/1/96)
Parallel resistor across FSR to allow for Pocket Pedal Calibration.
The addition of a 100K ohm resistor in parallel with the FSR indeed solved the Pocket Pedal calibration problem discovered in experiment #1. Once the combination of FSR, Pocket Pedal, and VL1 synthesizer was realized, the system was set up so the VL1 would interpret Portamento CC's from the FSR/Pocket Pedal into the "scream" controller on the VL1.
As was done in the earlier experiments on adding Tilt Sensing to a wind synth, the flexibility of the VL1 permits customizing the scream response curve. I set the scream curve to an inward bow shape (concave) to about -9. This allowed the FSR to be in contact with my finger, but not responding until a moderate push force was applied to the sensor.
Experiment #3: (11/09/96 thru 2/15/97)
Mounting Locations on the WX11 Wind SynthSeveral folks on the wind list server have suggested ideas for experimental locations of the FSR. Those ideas, and the results are:
Two or more wired in parallel on the keys of right and left hand.
For this experiment I mounted one FSR on the B key (index finger, left hand) and another on the F key (index finger, right hand), with both wired in parallel. This worked electrically, but was virtually uncontrollable due to my personal handling preferences on the synth, and the controller was rendered unavailable when playing C#. The FSR on the F key was of no value, since the WX11 wind synth responds to this key as a 1/2 step increment, regardless of where the other fingers are placed. I originally proposed the dual FSR approach thinking of woodwind playing, where a finger used below the operating tube length would have no impact on the note being played. But, this is a wind synth after all!
In general, I suggest that this is not a particularly viable option without extensive playing training to avoid squeezing the controller patches when the effect is not desired. For another perspective on key pressure aftertouch, refer to Bouvard Hosticka's experiments on the ERC.
Top of the mouthpiece slightly forward of the teeth.
This idea was suggested by Dave Brown, and has not been tested yet. The idea here is that when you want the aftertouch effect, you can change your bite slightly, and then rotate the wind synth into your upper teeth, effecting the FSR.
Top of the right hand thumb, under the thumbhook
This idea did not work well. I found it very difficult to create the desired pressure onto the thumbhook. Both flexing my right thumb upward and pushing down the WX into the right thumb proved to inhibit my playing with the rest of my fingers. It just plain felt unnatural, was hard to generate the needed pressure, and didn't work well.
Back of the neckstrap
 The idea here is that when the aftertouch effect is desired, the player
can just pull the wind synth away from the neck strap. Original designs
were considered using strain guages, but the FSR is simpler and requires
less to interface to the Anatek Pocket Pedal.
The idea here is that when the aftertouch effect is desired, the player
can just pull the wind synth away from the neck strap. Original designs
were considered using strain guages, but the FSR is simpler and requires
less to interface to the Anatek Pocket Pedal.
Interlink Electronics makes a long thin FSR device which would nicely fit along a sax/synth strap. Despite my claims previously that I did not have one of the long thin FSRs in my development kit, I found one that had slipped down behind a piece of packing foam. On trying out this idea, I skotch taped a 15cm (~6") long FSR to the skin side of my WX/sax strap. Hooking up as usual to the Anatek pocket pedal, I was able to affect the continuous controller as desired.
HOME RUN! - This worked perfectly and reliably. The action was comfortable, even when playing fast passages, I was able to get reasonable control over the strap pull force. As expected, practice will be essential to mastering this controller, but geesh, it worked!
The next step is to sew a small cover for the FSR so the sharp plastic edges of the FSR don't hurt my neck, but that will be easy. A small sub-mini (1/8") audio plug would facilitate electrical connections onto the WX instead of dealing with a separate line off of the strap into the Anatek on the floor. I'm more inclined to keep the strap clipped onto the WX and take it on and off with it kept attached. Then the cable would run to the floor alongside (wire ties) or as part of the WX cable.
Inside of a shoe where the big toe can press down
Stephen Anderson dubbed this idea "VL-suede shoes". Great name for an idea that isn't as silly as it sounds. Essentially, it is a 1.5" square FSR patch which is placed inside the players shoe, underneath the big toe. This experiment is detailed on it's own experiment page, found under the experiment called VL-suede Shoes. In brief, it works very well, but positioning inside the shoe is critical, and it's easy to mistakenly actuate the controller.
Experiment #4 - FSR added to Neckstrap Ring *Internally* to WX7
(quoting from my email posting to the windlist)
I'm really excited to report that this weekend (Jan 10, 1998) I successfully added an FSR *inside* my WX7, and it responds to pulling on the neckstrap ring. The FSR is connected between ground (pin #3) and the one remaining unused pin (#1) on the mini-DIN.
First, some background:
Last year or so, I was puttering wildly with FSRs (force sensing resistors) in an effort to add another controller to my WX. The most comfortable location turned out to be on the neckstrap.
Bob Miller improved on the neckstrap idea by making a WX11 'add-on' neckstrap ring which could squeeze the FSR using the same neckstrap pull motion that I was using, but at the add-on ring. Bob also came up with the idea of using the unused pin on the WX connector.
Now, the internal version:
 Leveraging off of Bob Miller's ideas, I looked at the WX7 neckstrap ring.
It is actually U shaped, and is attached with screws from inside the WX7
body (the WX11 is different). Sort of like the way a file cabinet drawer
handle is attached. I made a rectangular "pressure plate" (actually more
like an oblong washer) and put it between the top internal neckstrap screw
and the internal plastic backplate. By keeping the uper neckstrap ring
screw loose, and with some backing foam on the WX body, I was able to
squeeze the FSR pretty effectively (250K ohms - 75K ohms).
Leveraging off of Bob Miller's ideas, I looked at the WX7 neckstrap ring.
It is actually U shaped, and is attached with screws from inside the WX7
body (the WX11 is different). Sort of like the way a file cabinet drawer
handle is attached. I made a rectangular "pressure plate" (actually more
like an oblong washer) and put it between the top internal neckstrap screw
and the internal plastic backplate. By keeping the uper neckstrap ring
screw loose, and with some backing foam on the WX body, I was able to
squeeze the FSR pretty effectively (250K ohms - 75K ohms).
Most anybody looking inside the WX7 at the neckstrap ring attachment will get the idea. Convienently, there's even a channel in the plastic backplate for the tail of the FSR to lay (pointing towards the mpc), and it's easy to fold that towards the butt end of the WX and thread some small wires down to the WX mini-DIN connector.
 The only fussy part was making the rectangular pressure plate (10mm x 5mm),
and finding the right foam to put between the FSR (stuck on the pressure plate)
and the WX plastic backplate. An adhesive foam pad that came with the FSR
experimenters kit was sufficient (2mm thick), but I'd like to quantify the
forces and perhaps add a spring washer to the screw head of the lower ring
screw.
The only fussy part was making the rectangular pressure plate (10mm x 5mm),
and finding the right foam to put between the FSR (stuck on the pressure plate)
and the WX plastic backplate. An adhesive foam pad that came with the FSR
experimenters kit was sufficient (2mm thick), but I'd like to quantify the
forces and perhaps add a spring washer to the screw head of the lower ring
screw.
... This mod did not take very long, perhaps 3 hours or so. Since I put a WX input connector on my MFC-1 footpedal controller, it will be very easy to permanantly wire this into the CC input that's already part of the MFC-1. For testing this weekend, I mostly looked at resistance with an ohmmeter, but also used a pocket pedal to send real CCs.
I encourage anyone else out there with FSRs to take off the back cover, take a look, and attempt a similar mod. The more of us that work with this stuff, the smarter we all become. The WX11 uses a D shaped ring with different attachment, but the squeezing idea between ring mount and WX back cover will still hopefully work. In the WX7, you'd think it was made to do this!